
jasonX
Bardzo aktywny
- Dołączył
- 23 Październik 2015
- Posty
- 149
- Reakcje/Polubienia
- 987
A second look at Seagate DiscWizard
Seagate DiscWizard has been around a long time and has been proven to be a great free backup disc imaging/cloning software suite that will ensure the security of all of the information/data in your computer. It will backup the OS including all the applications, settings and data. It will also allow you to securely destroy sensitive/confidential information that you may no longer need. As the name implies it is tailored for use with Seagate (and Maxtor) drives installed on your computer, otherwise you won’t be able to perform any backup or cloning actions. The new Seagate DiscWizard can now help you when you want to migrate from your existing hard drive to an SSD drive. The new version comes with the Intel Data Migration Software which are meant for everybody who wants to upgrade to an Intel SSD drive.
Backing up
Backing up is pretty straight forward. DiscWizard will back up the entire disk drive or selected partitions. It can perform full, incremental and differential version backups.
A full backup version forms a base for further incremental or differential backups. A full backup method/version can also be used as a standalone full backup which is best if you "often" roll back the system to its initial state or if you do not like to often oversee a number of backup versions.
An incremental backup method/version contains only those files which have been changed since the last backup you did. This is best when you need frequent backup versions and rolling back to a specific time. A downside about incremental backups is during recovery it needs to read all the backups from the full version backup to the incremental versions. If you lose an incremental backup, say, due to corruption, all the other incremental backups are unusable. Thus incremental recovery is compromised.
A differential backup method/version contains only those files which have been changed since the last "full" backup. Downside is that the size of the backup in comparison to "incremental" is bigger. But the plus is that it is more dependable than "incremental" as in recovery it needs only the last "full" backup version along with the last differential version. Thus recovery from a differential version is simpler and much more reliable than recovery from an incremental version.
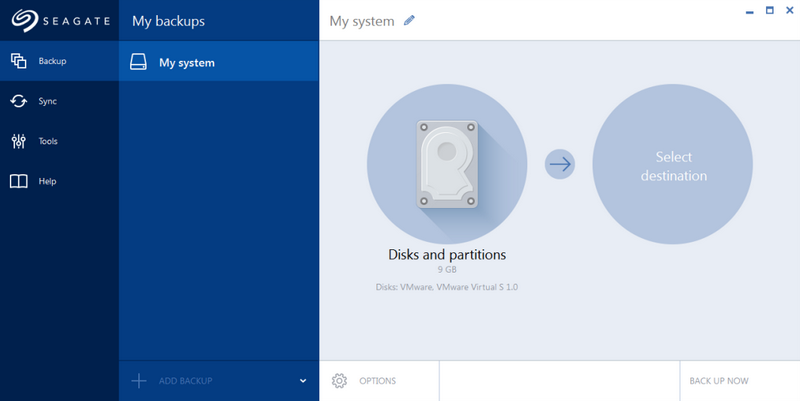
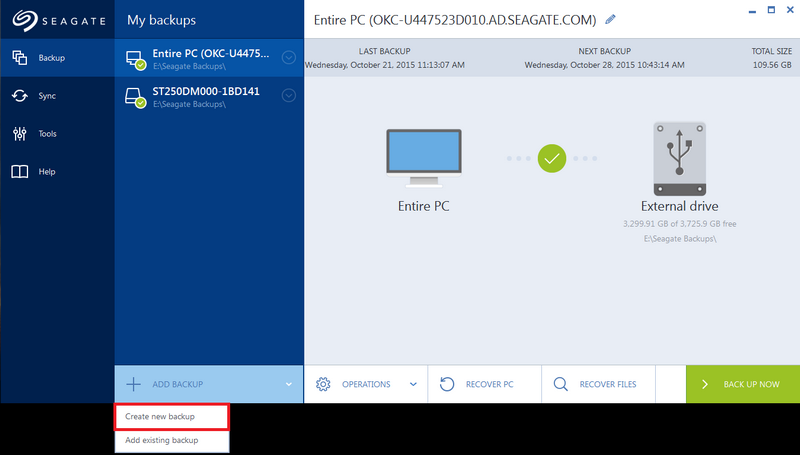
To backup, glance onto the sidebar and click "Backup". At the bottom of the backup list you will see a (+) sign which says, "Add Backup" then enter a name for your backup. Select the Backup Source icon and then click "Disk and partitions". Place a check on the box next to the partitions and disks that you want to back up, and then click OK. That's it.
You can schedule automatic backups ahead of time. Your data will be backed up as long as there is sufficient storage space. Backups are set on a weekly schedule by default. You can change it in the "Options" menu to "Do not schedule". For weekly scheduling you can set it via selecting the days on which the backup operation is to be performed or via selecting a specific time, entering the hours and minutes, or set the specified time using the up and down buttons.
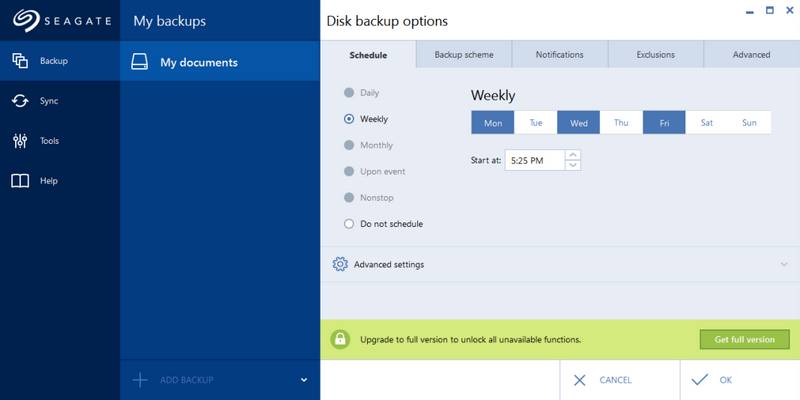
Backup Schemes is alongside the scheduling helps you to set-up the best backup strategy to suit your needs. Additionally it helps you optimize your storage space, improve storage reliability and automatically delete obsolete backup versions. DiscWizard allows you to set a "Single version" scheme or a "Custom scheme".
Single version scheme s tailored for your use of the smallest backup storage available. If you choose this scheme, DiscWizard will create a full version backup and will overwrite it when it you run a backup manually or according to a schedule you set. The result is that you will have a "single-up-to-date-full version backup" with minimal storage space. Custom scheme allows you to create your own backup scheme on your preferences. There are pre-defined backup schemes where you can select what you prefer and then save it as a new one. In addition, you can create custom schemes from scratch based on full, differential or incremental backup versions. Cleaning up of obsolete backup version can be set automatically where you have the option to set automatic deletion based on a specified period(time), per number of backup versions you specify or a maximum size limit for a backup version.
Notifications can also be set to inform you if you do not have sufficient space left based on the threshold value set for your backups. If DiscWizard determines that the free space is less than the threshold value specified it will not begin the backup process and will inform you by displaying an appropriate message.
Exclusions gives you the capability to exclude unnecessary files via specifying the files types, mask or file path to exclude.
Advanced tab carries among other things how you set image creation(sector-by-sector), encrypt/password protect backups, backup splitting, backup validation,
backup comments..etc. Backup validation should always be considered. It is always a sound decision to validate a backup once it is created so that you will know that your backup is not corrupted. You can also run validation either automatically/manually (and before recovery)to ensure it's validity. Backing up (without validation) and then letting it stay frosty until you need it might give some problems when you need to recover the image. What happens when it ends in a validation error? You have nothing to recover!
Recovery
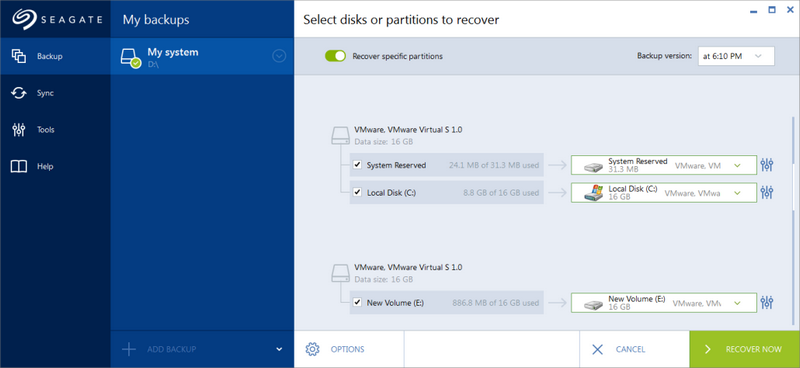
Recovering disks or partitions is also easy and straight-forward. Select "Backup" in the sidebar and in the backup section select the backup which contains the disk or partitions you prefer to recover. Click "Recover disks". The Backup version list will show backup versions by it's backup date and time. Select the disks to recover(to recover separate partitions yo need to click Recover specific partitions then select the partitions to recover). Select recovery destination and click "Recover Now" to start the recovery process.
DiscWizard allows to you to recover files and folders both from file-level and disk-level backups. On the sidebar, click Backup. The backup list will show he backup which contains the files or folders that you want to recover. Click Recover files. Select backup version based on specific date and time. Select the files and folders that you want to recover, and then click Next.
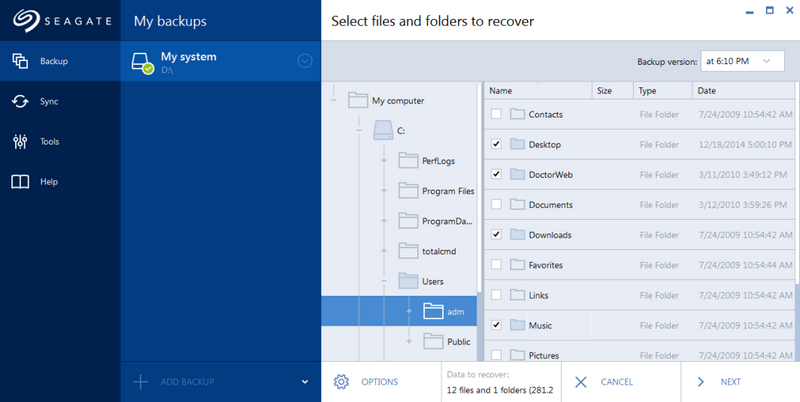
Select a destination location where you want to recover selected files/folders. You can recover data to its original location or choose a new one. To choose a new location, you need to click the Browse button. In choosing a new location, the selected items will be recovered by default without
the original/absolute path. Click the Recover now to start the recovery process.
You can also recover files and folders directly from Windows Explorer. To do that you have to double-click the corresponding ".tib file" (which is the backup version where the files/folders you want to recover are in) and then browse manually to the location of the file or folder that you want to
recover. Copy the file or folder to a hard disk.
Bootable rescue media
You can create bootable media using the Bootable Rescue Media Builder. You will need a blank CD-R/RW, a blank DVD+R/RW or any other media from which your computer can boot, such as a USB flash drive. Seagate DiscWizard also provides the ability to create an ISO image of a bootable disc on the hard disk. You can also use this ISO image to incorporate it on a multi-boot USB (via YUMI, SARDU etc).
Plug in a USB flash drive, or insert a blank CD or DVD. Run DiscWizard and in the Tools and utilities section click Rescue Media Builder. Choose a media type that you want to create. Select a destination for the media(either CD/DVD, USB(formatted in FAT file system), ISO image or WIM image file. Click Proceed to start the creation.
Test the rescue media
It is also a sound decision to always test the rescue media. Say you created a DVD bootable rescue media, you must check and see if it will work. Test if your pc/laptop will boot from that rescue media and also check if the rescue media recognizes all your computer devices, such as hard drives, mouse, keyboard, network adapter and of course your selected backup destination!
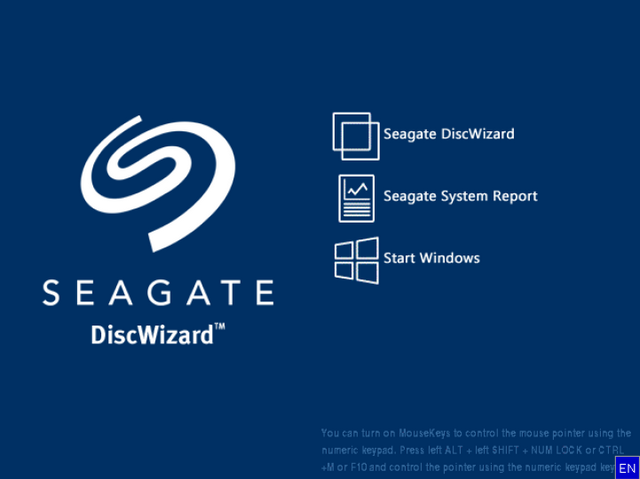
First set your computer to enable booting from the rescue media(usually in the BIOS). Set your rescue media device as "first boot device. If you have a rescue CD, press any key to start booting from the CD, when you see the prompt "Press any key to boot from CD". After the boot menu appears, choose True Image.
When DiscWizard starts, check if it detects all your devices. It is recommend to try recovering some files from a backup you have made. Make a test recovery to ensure that your bootable media disc can be used for recovery. Try to make a backup as well.
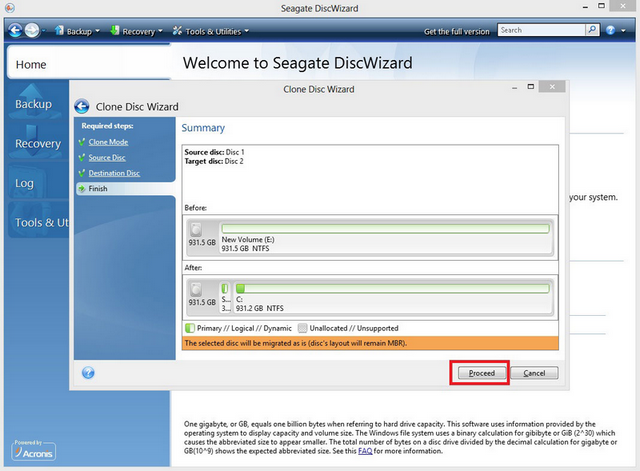
Disk cloning and migration
Note: DiscWizard recommends to always perform disk cloning from the DiscWizard Boot CD
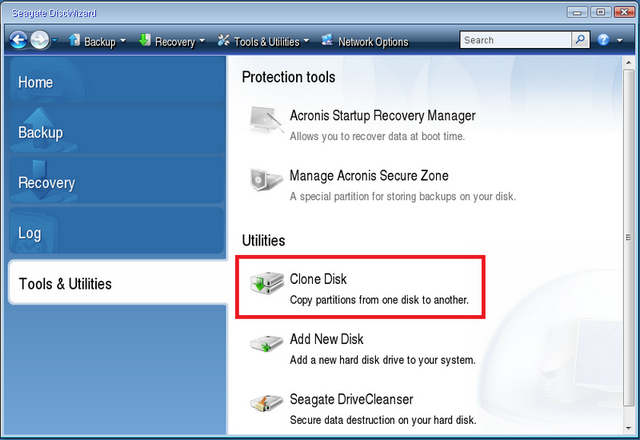
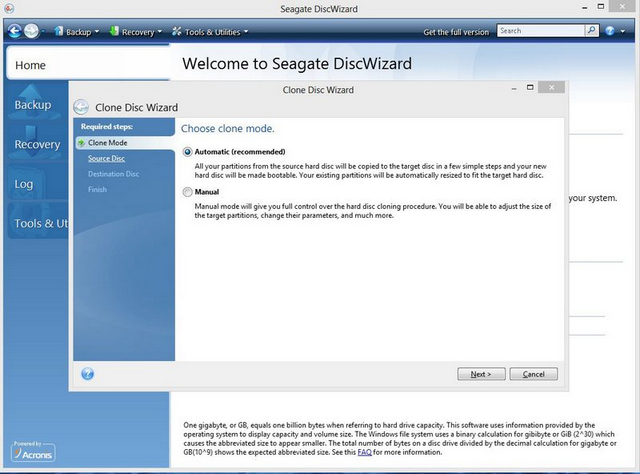
Oftentimes you will run out of space and will need to migrate to a bigger size disk. You can use the clone disk feature of DiscWizard. When cloning a disk it is recommended to perform it via the Seagate DiscWizard Boot CD clone disk utility. On the sidebar you need to go to Tools and Utilities>Utilities, and then click Clone disk. In most cases(recommended) the automatic clone mode is preferred. It is also best to sue automatic so that the source drive partitions be automatically and proportionally resized to fit the new drive. Choose the old drive as the Source Disk. Select the new drive as the Destination Disk. After you have checked all the settings click Proceed to start the clone operation.


Migrate to SSD
DiscWizard can help you migrate your old HDD to a new SSD. There are pre-requisites/safeguards to do this. One is to do the migration using the DiscWizard Boot Disc and the second is to backup the system drive(in disk backup mode) to a hard drive other than the system hard disk and the new SSD. Validate the backup. After backing up the system drive, turn-off the computer and remove the system hard disk. Mount the SSD onto the slot where the system hard disk was. Boot to the DiscWizard Boot Disc and select Recover. In the Recovery method select "Recover whole disks and partitions". In What to recover select the system hard disk. In the New location select the new SSD and then click Accept. Click Proceed to start the recovery process. After recovery, reboot and remove the DiscWizard Boot Disc and try to boot from the SSD. Check and make sure that Windows and all applications are working properly.
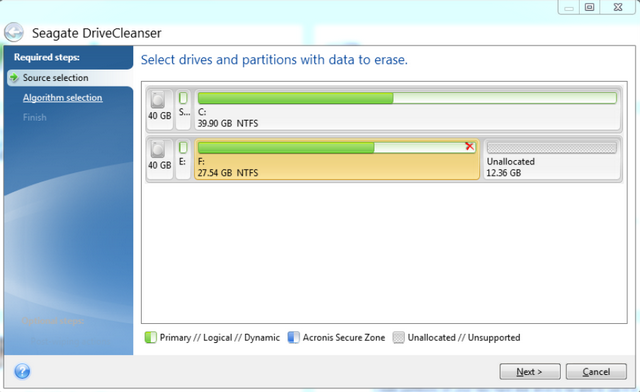
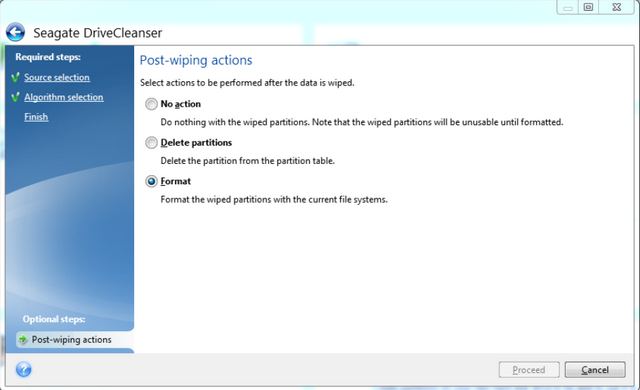
Seagate DriveCleanser
Seagate DriveCleanser allows you to securely destroy all data on selected hard disks and partitions permanently. We all know that we cannot destroy all the data from a drive that we want to throw away by merely just formatting because it still can be retrieved. If that happens those sensitive information can fall into the wrong hands and who knows where it can be used or for what purpose. For this purpose DiscWizard recommends:
- Replace your old hard drive with a new one and do not plan to use the old drive any more.
- Give your old hard drive to your relative or friend.
- Sell your old hard drive.
**DiscWizard cannot wipe partitions on dynamic and GPT disks.
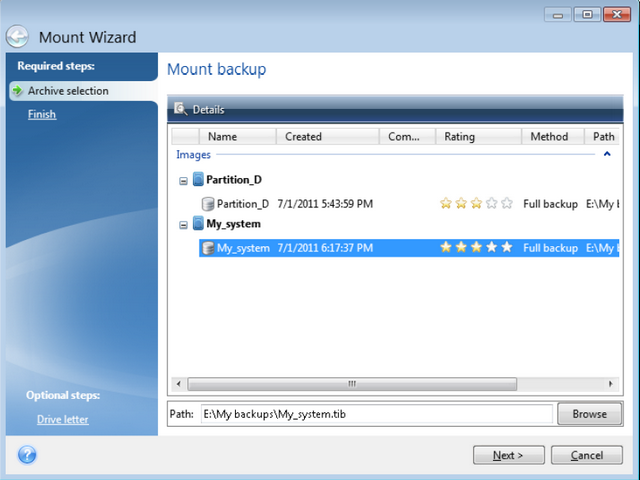
Mount and Unmount Images
Mounting of backup images lets you have access to the contents of the disk backup image as though they are a physical drive. When you mount an image it will appear as a new disk in your system( virtual mounted disk). From there you can view the contents in Windows Explorer and other file managers.
To unmount an image you just need to right-click the disk icon in Windows Explorer and click Unmount. You can either restart or shutdown your computer afterwards.
Of course as with any free version there are limitations attached. File/Folder backup for one isn't offered. It will only offer you disk and partition backup. From that backup you can have access to whatever files you need. To wrap it up, Seagate DiscWizard remains to be a comprehensive software suite that can help you protect all your data and recover your data and all your saved applications and settings effortlessly. The tools included make it an integrated suite for free!
Seagate DiscWizard 18.0.0 Build 6030 --latest version
Zaloguj lub Zarejestruj się aby zobaczyć!
Zaloguj lub Zarejestruj się aby zobaczyć!
Zaloguj lub Zarejestruj się aby zobaczyć!
Zaloguj lub Zarejestruj się aby zobaczyć!
Zaloguj lub Zarejestruj się aby zobaczyć!
Some alternatives to Seagate DiscWizard. Freeware alternatives
1.Zaloguj lub Zarejestruj się aby zobaczyć!
2.Zaloguj lub Zarejestruj się aby zobaczyć!
Zaloguj lub Zarejestruj się aby zobaczyć!
3.Zaloguj lub Zarejestruj się aby zobaczyć!
Zaloguj lub Zarejestruj się aby zobaczyć!
4.Zaloguj lub Zarejestruj się aby zobaczyć!
5.Zaloguj lub Zarejestruj się aby zobaczyć!
6.Zaloguj lub Zarejestruj się aby zobaczyć!
7.Zaloguj lub Zarejestruj się aby zobaczyć!
8.Zaloguj lub Zarejestruj się aby zobaczyć!
9.Zaloguj lub Zarejestruj się aby zobaczyć!
Some related informations below:
Zaloguj lub Zarejestruj się aby zobaczyć!
Zaloguj lub Zarejestruj się aby zobaczyć!
Zaloguj lub Zarejestruj się aby zobaczyć!
Zaloguj lub Zarejestruj się aby zobaczyć!
Zaloguj lub Zarejestruj się aby zobaczyć!
Zaloguj lub Zarejestruj się aby zobaczyć!